How to Share Files
 |
1. Click the Start menu and choose Network.
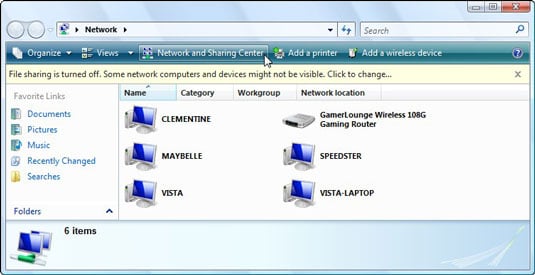
You may see icons for all your connected PCs, as shown here. To find out how to file share between computers, you first need to connect to a PC; double-click its name. Chances are, you’ll be able to see files on your Windows XP PCs, but not any other Vista PCs. To see files on Vista PCs, move to Step 2.
2. Click the Network and Sharing Center button.
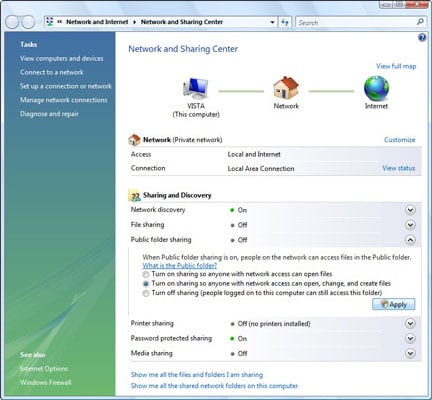
The Network and Sharing Center button, seen along the top of the previous figure, fetches the Network and Sharing Center, shown here.
3. How to file share between computers? Turn on Public Folder Sharing and click Apply.
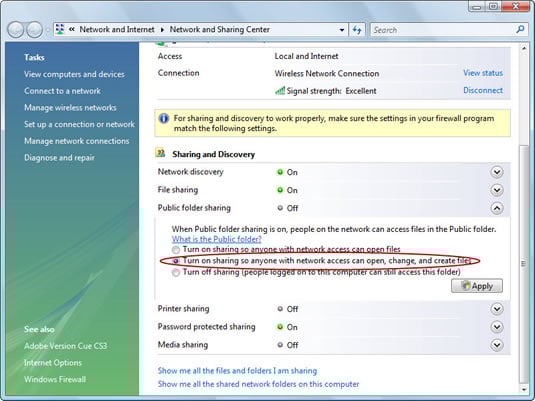
Click the word Off in the Public Folder Sharing area, and the settings menu drops down, as shown here. To share your files, choose Turn On Sharing So Anyone with Network Access Can Open, Change, and Create Files.
4. Turn off Password Protected Sharing and click Apply.

There’s one last hurdle. When somebody on the network tries to see inside a Vista PC’s Public folder, they must enter a name and password from an account on that other PC; their own name and password won’t do.
Although that makes for a very secure PC, it’s overkill in a family environment. To remove that layer of security, click the word On in the Public Folder Sharing area, as shown here. When the menu drops down, choose Turn Off Password Protected Sharing.

No comments:
Post a Comment